Showing posts with label jewelry. Show all posts

Tuesday, July 9, 2013

BRAIDED HEX NUT BRACELET DIY

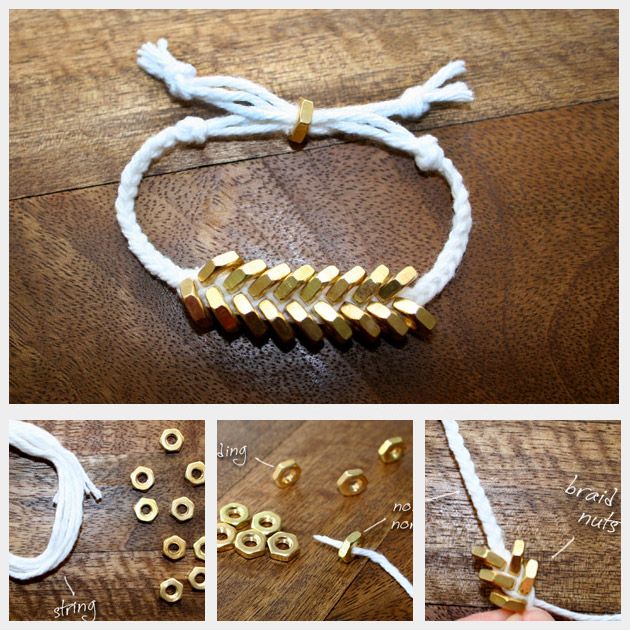
When I first saw this braided hex nut bracelet on Pinterest and I knew I had to make one. It’s a quick and easy project to make for less than $5 and looks great stacked with all your other bracelets.
Braided Hex Nut Bracelet Tutorial

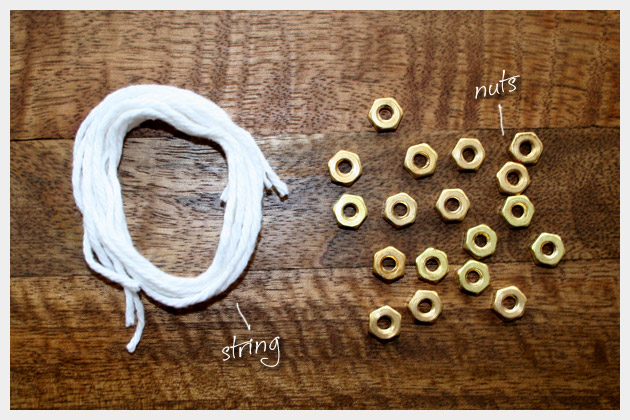
WHAT YOU’LL NEED TO MAKE YOUR BRAIDED HEX NUT BRACELET:

  1. String
  2. Hex Nuts (I used 18)
Braided Hex Nut Bracelet DIY
Step 1
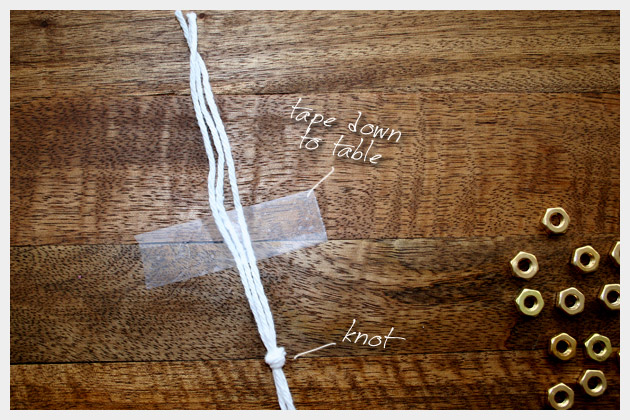
Cut 3 pieces of your string approximately 16 inches long (depending on the size of your wrist) and tie them together in a knot. I recommend taping the end to a table, this will make it much easier to work.
Braided Hex Nut Bracelet DIY
Step 2
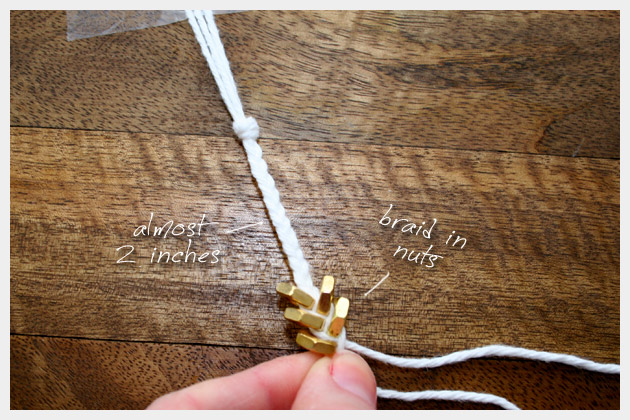
Braid for approximately 2 inches (mine is just under). Then start adding your hex nuts one at a time.
Braided Hex Nut Bracelet DIY
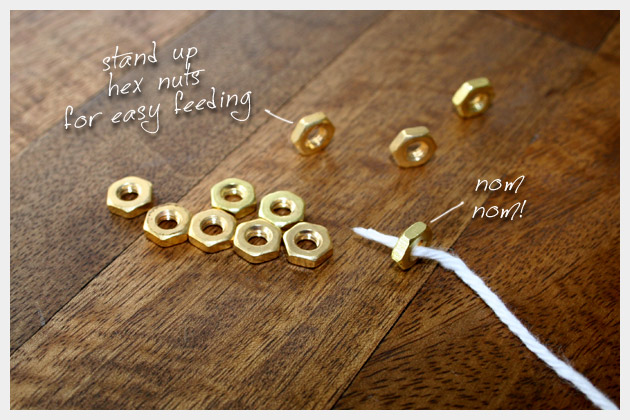
If you don’t have an assistant to help you put the hex nuts on your string, I recommend setting your hex nuts on their end and you will be able to thread them easier and with one hand as you hold your braid tight with the other.
Braided Hex Nut Bracelet DIY
Step 3
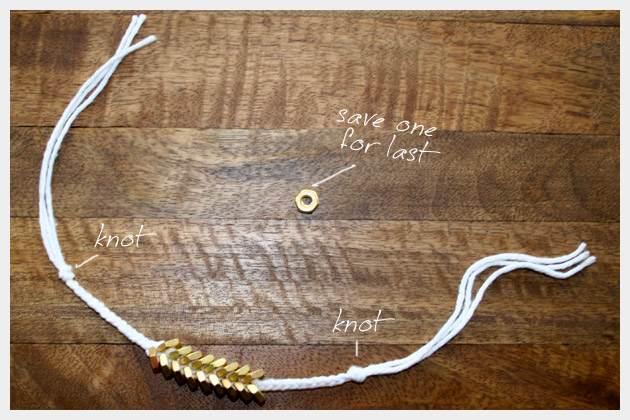
After you braid in all but one of your hex nuts continue to braid just the string for another 2 inches (approx). Then tie a knot to secure it.
Braided Hex Nut Bracelet DIY
Step 4
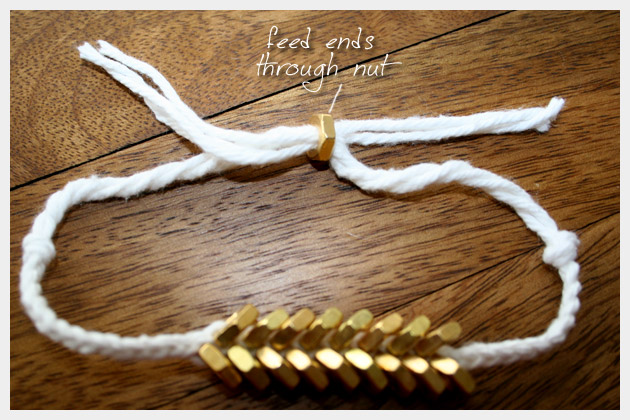
Thread the two ends of your bracelet through your last hex nut in opposite directions and knot each end. This makes it easy to put your bracelet on or take it off by yourself.
Braided Hex Nut Bracelet DIY

Thursday, July 4, 2013

DIY Tassel Earrings

You’ll need:

Japanese bunka cord is a very fine, high quality knitted rayon square cord that is perfect for making tassels. It usually comes in 6 meter skins. Start by unraveling the skeins of cord. Cut 2 3″ pieces and set them aside. Then cut the rest into multiple 8-10″ pieces. (For this tutorial, I used shades of peach and orange but of course, you can use just one color.) Separate the strands into two groups, approximately 20 strands each.
Lay the strands flat and pull them up from the middle. Take one of the 3″ pieces and slip it under the middle of the bunch. Tie into a double knot and trim away any excess.
Thread the eyepin through the bottom of the bead cap. Insert a small amount of E6000 into the bead cap.
Take the bunch of cord and stuff tied off middle section all the way into the bead cap. Hold in place for several seconds. Thread the corrugated bead on to of the bead cap.
Take the pliers and bend the eyepin 90 degrees to the left. Then wrap the eyepin clockwise around the right side of the pliers.
Bring the eyepin all the way around. While gripping the loop with the pliers, take the excess eyepin and start wrapping around the base of the loop.
After winding it around twice, trim away any excess wire.
Thread the loop through the earwire and trim the tassel to a desired length.
Repeat the same steps to complete your new pair of swinging tassel earrings!
So glam, so easy!

Tuesday, July 2, 2013

Friendship Bracelet DIY

For several months now, we’ve been receiving emails requesting a friendship bracelet DIY. Well, friends, ask and you shall receive! Today, we’ll give you a step by step tutorial on the classic chevron pattern. If you used to whip up friendship bracelets like a champ in grade school and have since forgotten how, consider this a refresher course. And if you can make these with your eyes closed and arms tied . . . umm, can we still be friends?

You’ll need:

  • embroidery thread
  • a safety pin or tape
  • a pair of scissors
Start by cutting several strands of embroidery thread at about 24 inches each. Make sure there are two sets of each color. Combine the threads and tie a knot, leaving at least 3 inches of slack. Tape it to a flat surface or safety pin it to a pillow. Separate the two sets, arranging the strands in a mirror-image pattern with the outside strands the same color and so on moving inwards.
Start on the left side with the outermost color (shown here in red) and make a forward knot by creating a 4-shape over the 2nd color, loop it under and back through the opening.
Pull up and to the right to tighten. Make the same knot twice over each color. Continue knotting over each color, towards the right, until the outermost color has carried over to the middle. This is one half of the chevron pattern.
Now pick up the outermost color on the right side (show here in red) and make a backward knot, creating a reverse 4-shape over the 2nd color, loop it under and back through the opening. Pull up and to the left to tighten. Don’t forget to knot twice over each color!
Continue knotting towards the left until the outermost strand reaches the middle. Tie a backwards knot with the two middle strands to connect the two halves. Did you remember to knot twice? The first chevron row is complete! Continue with the the next color, which is now the outermost strand . . .
Remembering the color order is important for the first few rows but after the 3rd or 4th row, the strands will fall nicely in place. Finish it with a knot and a braid.
For a striped bracelet, cut one set of colors and simply carry the outermost color all the way through to the right side. For an assymetrical chevron, mix the colors when dividing them into 2 sets. Be sure to count the number of strands so you know when to stop in the middle each time. For an embellished bracelet, take a small piece of rhinestone chain, glue it to the top of the bracelet and stitch embroidery thread between each rhinestone with an embroidery needle.
Its amazinggggggggggggg!
{ credit to honestlywtf }