If you follow my blog regularly you know how much I love big jewelry and on the top of that list are bracelets! This post is no exception. This cute and feminine beaded bow bracelet DIY is just the accessory to brighten up the simplest of summer outfits.
Because this bracelet is so quick and easy to make, you can make one for you and one for a friend.
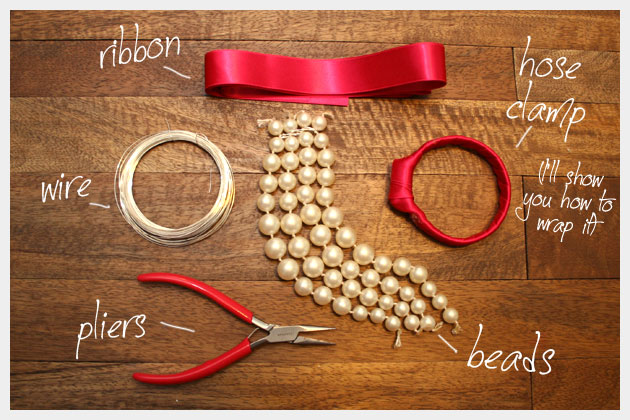
WHAT YOU’LL NEED TO MAKE YOUR BEADED BOW BRACELET:
- 1 Large hose clamp
- About 2 yds of 1” ribbon
- Multiple strands of a beaded necklace or beads to string yourself
- Wire – super thin about 22 gauge or smaller
- Hot glue
 Step 1
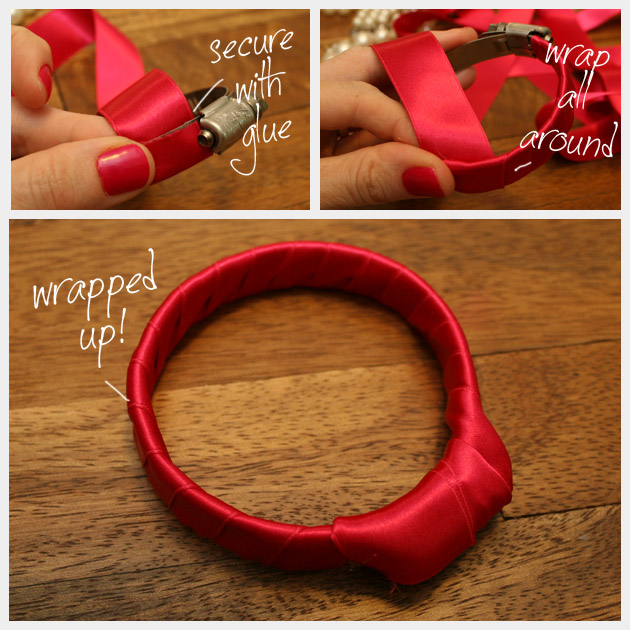
First unscrew your hose clamp to make it as large as you need it. You must be able to easily put your hand in and out of it without it falling off.
Take your hose clamp and your ribbon and starting at the top just under the screw part, wrap your ribbon around your hose clamp and secure it with a small drop of hot glue.
Step 2
Keep wrapping your ribbon tightly around your hose clamp until you have it completely covered and secure the end with a small drop of hot glue.
Step 3
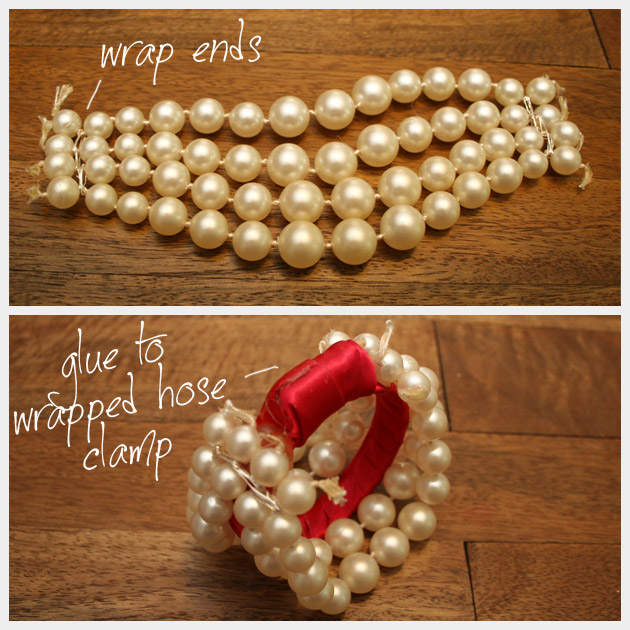
Measure your strands of beads and cut them all the same length. I cut mine at 7 inches. You’ll need to make sure you can slip your hand into the bracelet and at the same time you don’t want them to hang down too much.
Step 4
Take your wire and wrap the end bead of each strand of beads together so that they are all attached and parallel. Do the same for the other end.
Step 5
Using your hot glue, glue your 2 center beads to one side of your ribbon wrapped hose clamp as close to the top as possible. Do the same for the other side.
Step 6
Add a little more hot glue to the sides of the beads you just glued down and attach the end beads to secure.
Step 7
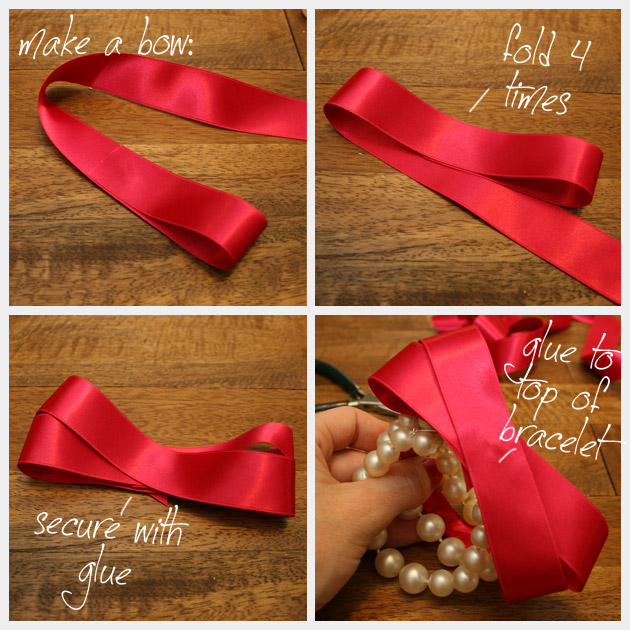
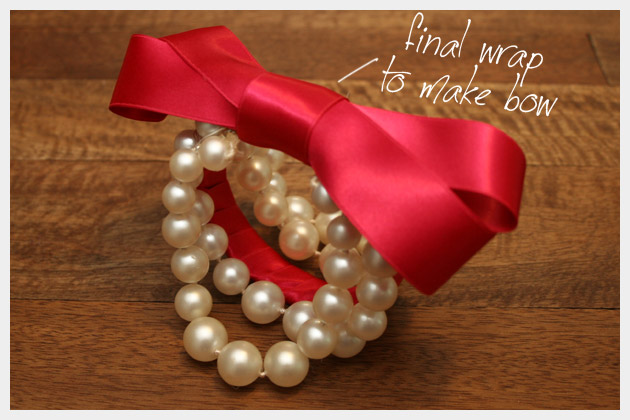
Take your remaining ribbon and make a bow. I made mine in 2 sections.
First, I folded my ribbon back and forth twice to form the bow (I made a double bow). Secure your ribbon with a little hot glue in between each layer of ribbon.
Second, glue this part of your bow to the top of the ribbon wrapped hose clamp.
 Third,
 take another piece of ribbon and hot glue one end to the underneath side of your ribbon wrapped hose clamp to secure and wrap around the entire top of the hose clamp including the bow and cut your ribbon. Be sure to leave a small tail on your ribbon to fold over and glue down on the underneath side of your bracelet.
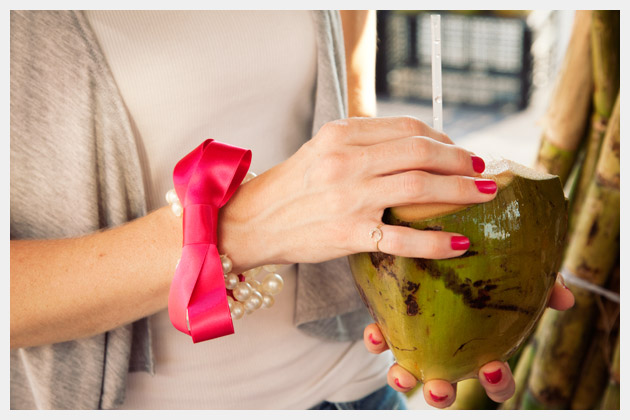
And this is the result! Hope you like it! Because i do :)
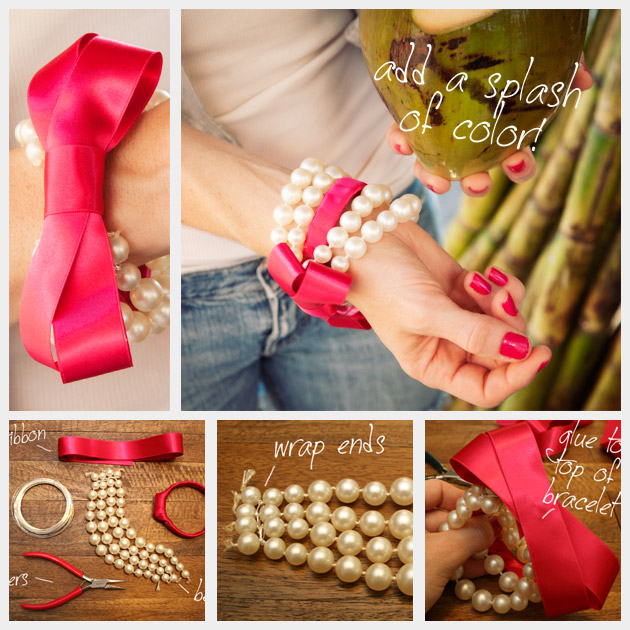


 Third, take another piece of ribbon and hot glue one end to the underneath side of your ribbon wrapped hose clamp to secure and wrap around the entire top of the hose clamp including the bow and cut your ribbon. Be sure to leave a small tail on your ribbon to fold over and glue down on the underneath side of your bracelet.
 And this is the result! Hope you like it! Because i do :)