
Nothing says summer like a fresh friendship bracelet! Whether you’re reliving your days as a summer camper or simply love wearing a stack of handmade goodies on your arm, we think you’re gonna love these 4 simple ways to make friendship bracelets. Best of all, all 4 of these can be made with just a handful of materials.

Materials:- waxed cotton cord (turquoise)
- embroidery floss (lavender + violet)
- gold tube
- rhinestone chain
- wooden buttons
- brass ring
- gold round studs
- embroidery floss (lavender + violet)
- gold tube
- rhinestone chain
- wooden buttons
- brass ring
- gold round studs
Tools:- needle nose pliers (for studs)

The materials of this can be found at most craft and jewelry stores. Choose colors that you love!
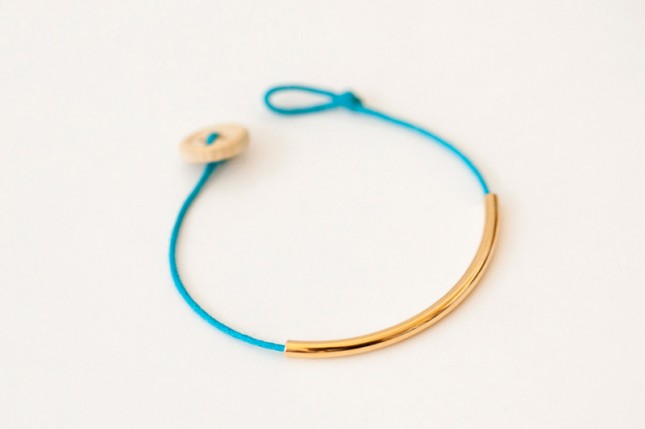
1. Gold Tube Bracelet: This is a simple twist on a stacked bracelet.

Create a loop at the end by tying a knot. Snip off excess cord. Measure the cord to fit your wrist and leave a 2-3 inches extra cord for the button clasp. Slip on the gold tube. Finally, thread your button on and tie so that it fits nicely around your wrist. Cut off any excess cord and you’re done!
2. Rhinestone Cowgirl: We can’t talk about rhinestones without talking about stylish cowgirls, can we?
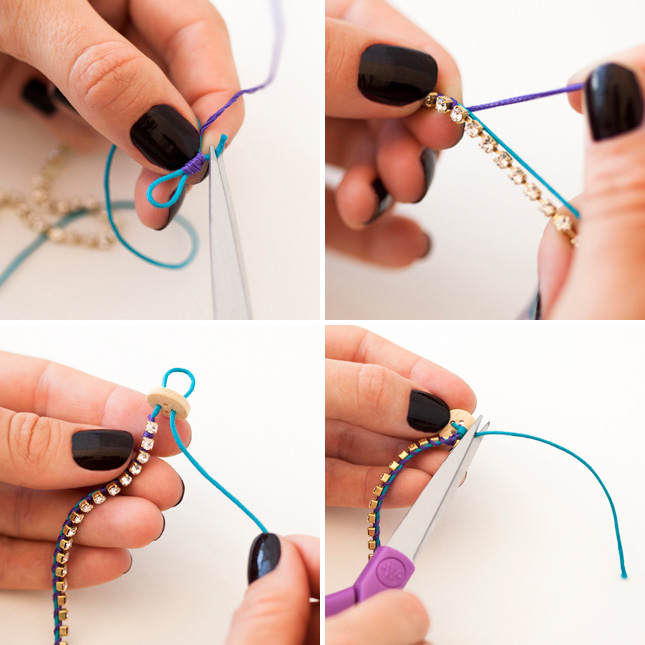
Take one piece of waxed cotton cord and one piece of embroidery floss and cut to a few inches longer than your rhinestone piece. The rhinestone piece should fit around your wrist. Wrap embroidery floss around the cotton cord to create a loop, as seen in the first photo. Attach the rhinestones by lining up with the waxed cord and wrapping with embroidery floss. Add a button at the end!
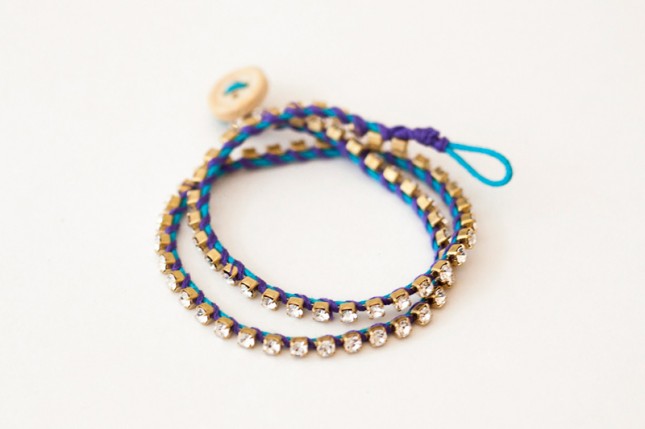
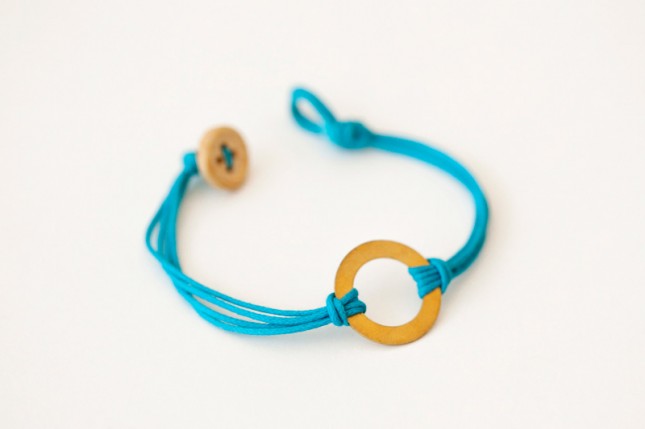
3. Brass Ring: This is a more delicate and colorful one.
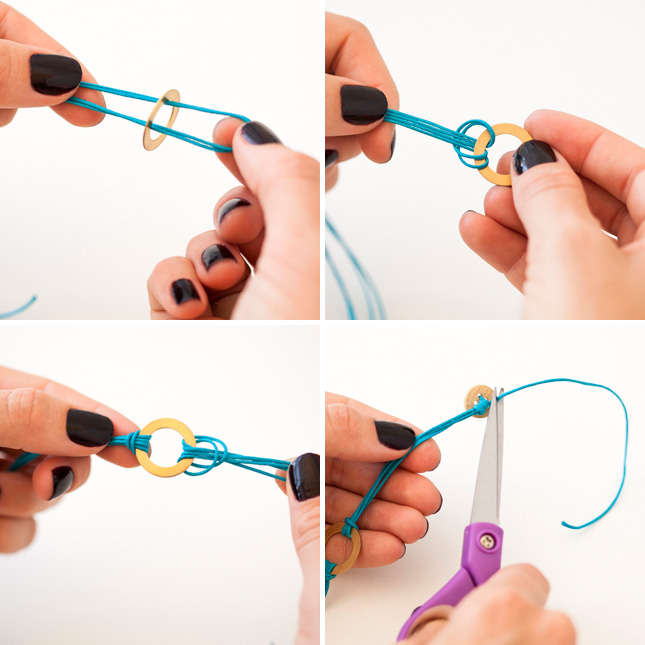
This tutorial couldn’t be simpler. You’ll need four pieces of waxed cotton cord. Take the first two and loop them through the brass ring, creating a topsy tail style knot. Do the same on the other side. Then create a loop on one end and and add a button to the opposite one. Done-zo!
4. Studded + Woven: This is definitely the most complicated option, but the results are awesome.

First, it’s time to channel your friendship bracelet-making skills. We went with a simple knotting pattern, found in more detail from our friends at Honestly WTF here. The basic gist is that you start with 8 pieces of embroidery floss and knot in succession to create rows of knots. When you tie floss together, be sure to create a loop. Rotate colors and keep doing this until you reach the end. We recommend cutting your embroidery floss to three times the length of your wrist to make sure you don’t end up with a short bracelet.
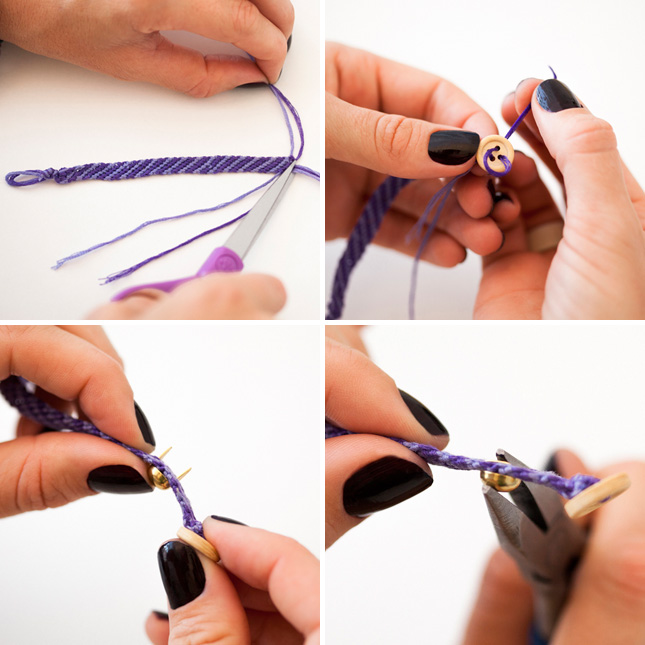
Add a button to the end. Then it’s time to stud! Press through the bracelet and use needle nose pliers to secure on the other side.
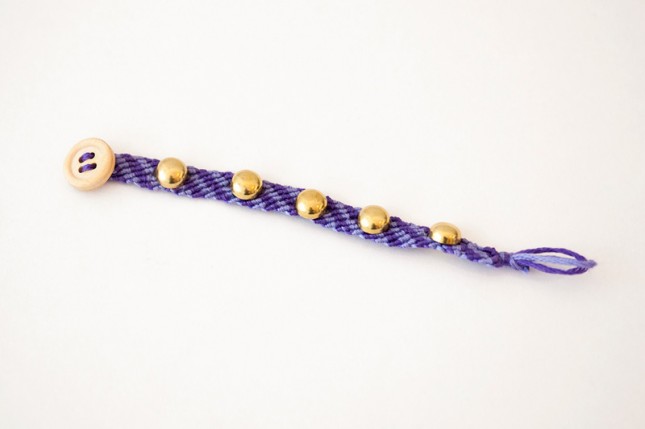
We love the round studs on this, but you could also use square or diamond-shaped ones.
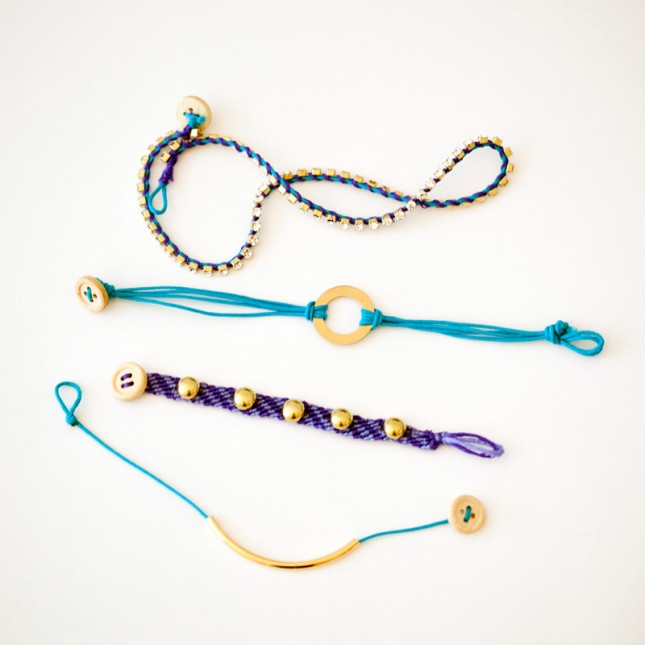
Ta-daa!

No comments:
Post a Comment